How to Make a Magnetic Staff White Board
In the world of music education, having a versatile and interactive tool can make a significant difference in student learning outcomes. A magnetic staff whiteboard and magnetic note set are must-have additions to any music teacher's toolkit, offering flexibility and creativity in lessons. In this DIY guide, we'll walk you through the steps to create your very own magnetic staff whiteboard to use with our Sound Shapes.
Affiliate Link Disclosure:
The links provided in this blog post are affiliate links.
Get a Magnetic Dry Erase Board
I used this 18x24 board from Amazon. Though it’s large, it still fits on most piano music racks, and can rest on a free-standing music stand for off-bench activities or when not in use. It can also be mounted on the wall!


2. Create the Staff Lines
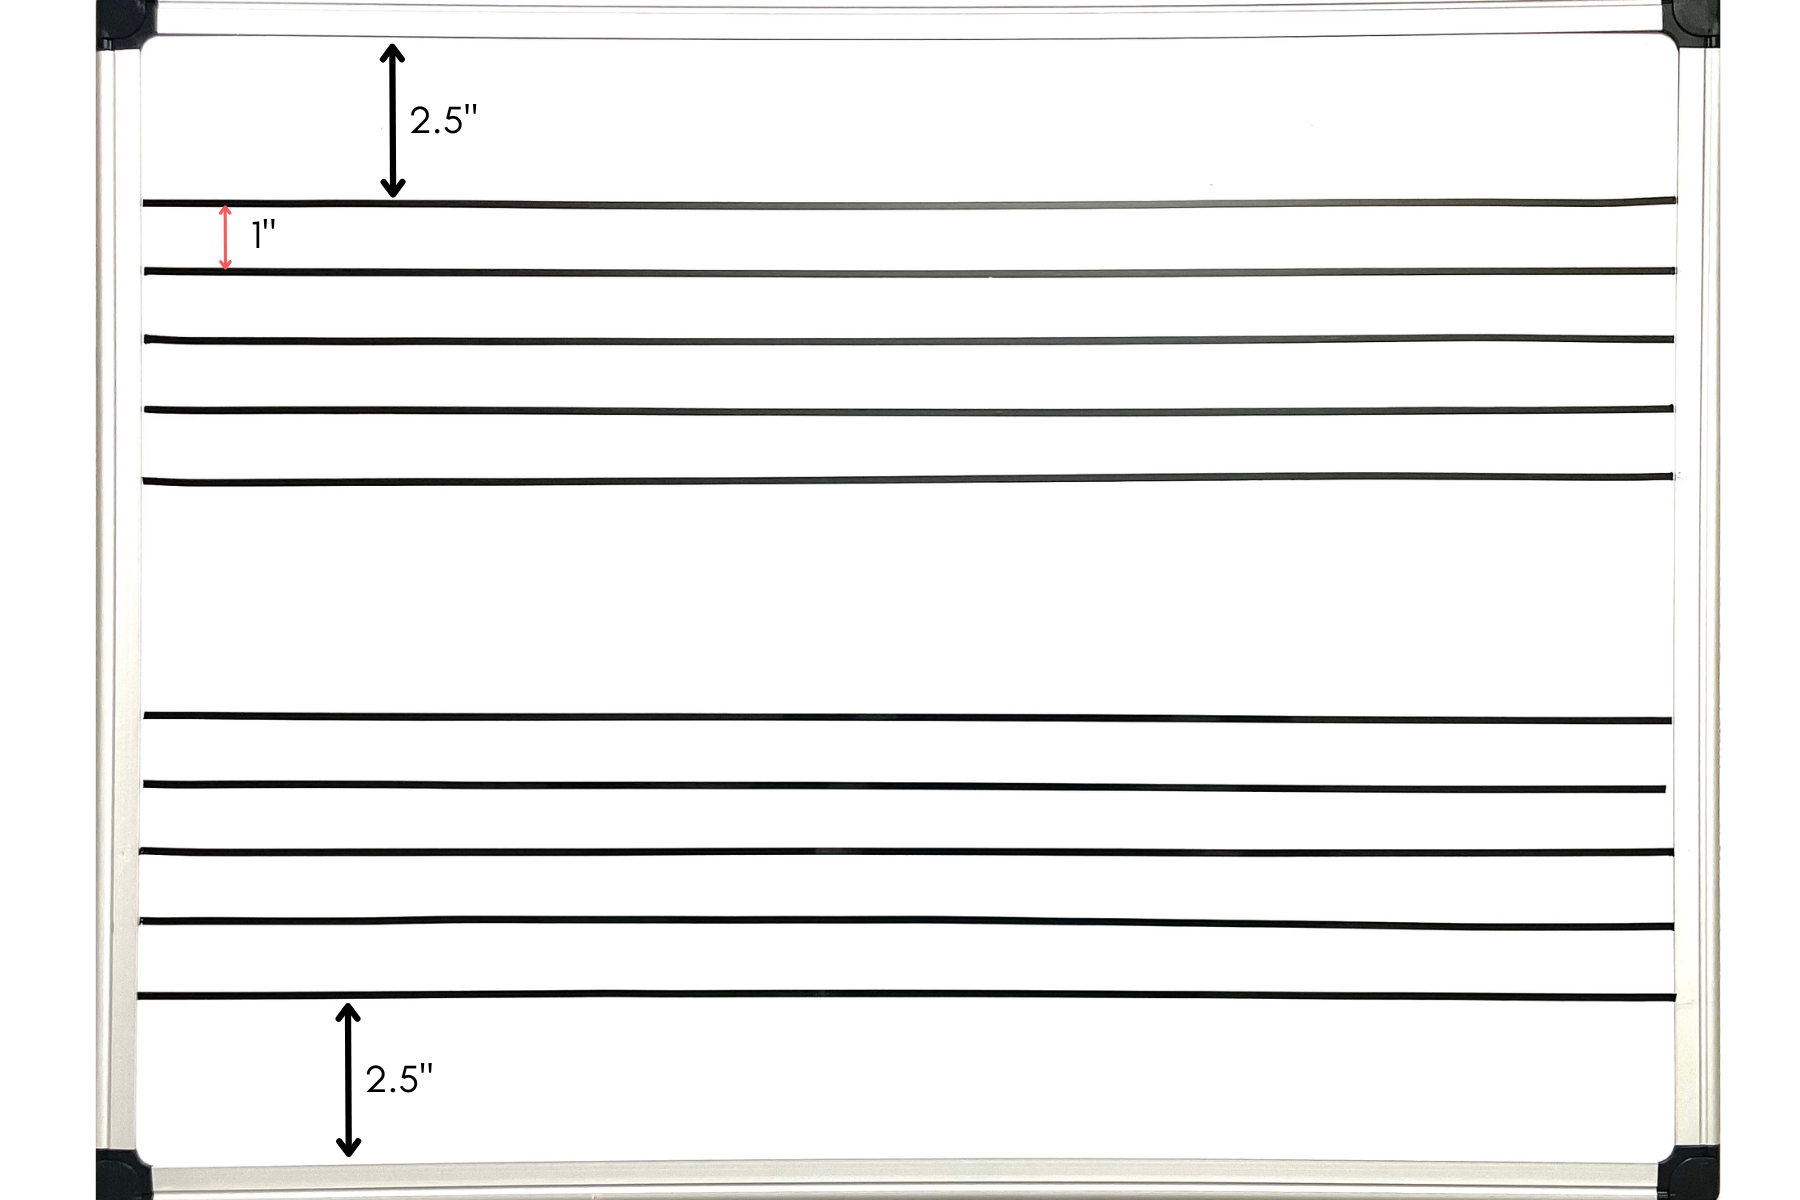
In order to accommodate our Sound Shapes, staff lines need to be 1” apart (from the center point of each line.) For the 18x24 board, the staves should start 2.5 inches from the edges of the board.
Lay a tape measure from end to end of the white board surface. With a dry erase marker, plot 5 dots starting 2.5” from the top of the board. Do the same for the bottom.

2. Use the ruler to trace the staff lines across the board. Make sure the edge of the ruler is square with the edge of the white board so your lines can be perfectly parallel!

3. Once all lines are plotted and you’re satisfied with the spacing and straightness of the lines, stretch a piece of white board tape over each dry-erase line. Tip: it’s easier to get a straight line with a longer piece of tape! This tape is easy to apply and is durable enough to withstand dry erase writing and erasing without budging or peeling.

3. Have fun with it!
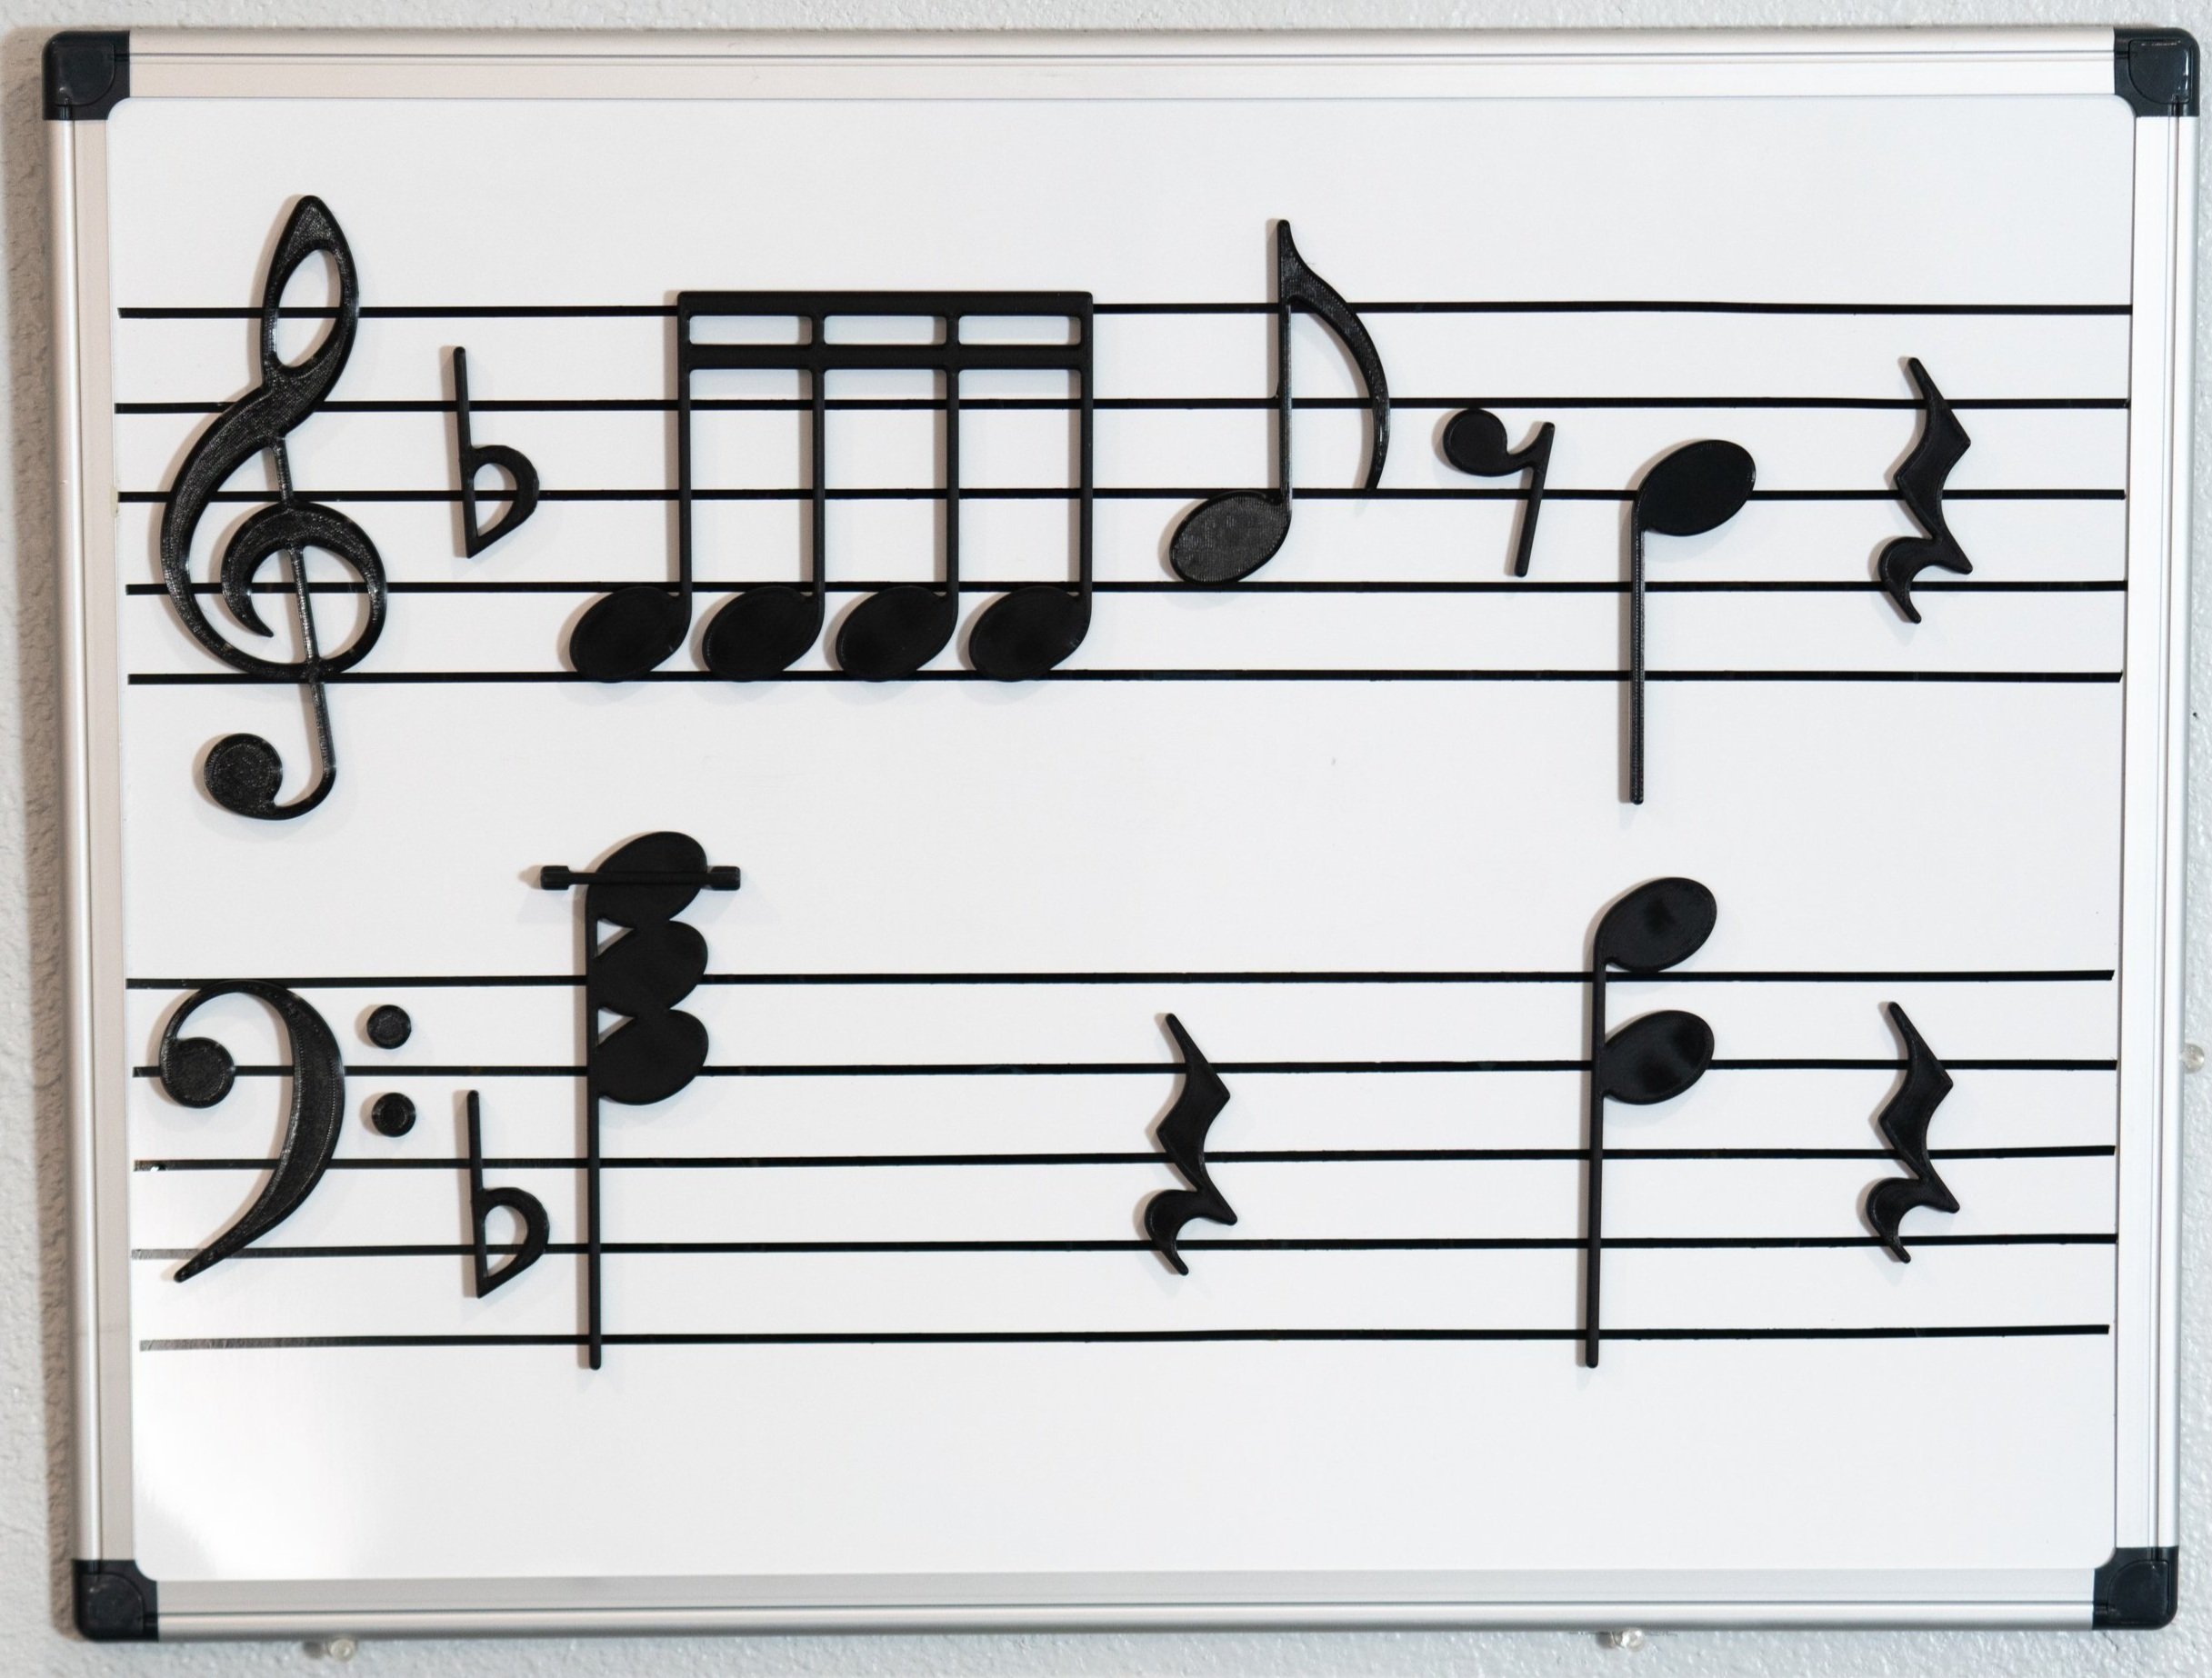
With a magnetic white board and sound shapes, the learning possibilities are endless! Students will have fun while strengthening their musical skills, and that’s always a win. Follow @cadenzastudios on Instagram for activity inspiration!